The MMP1 Studio Monitor Management System offers all essential audio processing functionality for DAW-based production environments in one streamlined, versatile, great-sounding, space-saving unit that provides efficient overall system management at surprisingly low cost.
Key Features
A ONE-STOP SOLUTION FOR IN-THE-BOX STUDIOS
Audio production is evolving rapidly. Many functions that were previously handled by the mixing console are now built into high-performance DAW systems. But even today’s most practical in-the-box mixing systems require a number of peripheral devices for full studio functionality, including some sort of monitor controller. Immersive audio formats have made the requirements for monitor control and management even more varied and complex. Yamaha has applied a great deal of time and effort to developing monitoring environments and studio systems for current and future audio production needs, and has come up with an ideal one-stop solution.
The MMP1 Studio Monitor Management System offers all essential audio processing functionality for DAW-based production environments in one streamlined, versatile, great-sounding, space-saving unit that provides efficient overall system management at surprisingly low cost.
available by November 2017
-
Comprehensive Monitor Control
Up to 32 channels of monitor processing supports formats from stereo to immersive audio, plus comprehensive management of studio communication and audio devices.

-
Flexible Bass Management
Bass management using standard or FIR crossover filters can be flexibly configured within a 32 x 32 channel speaker matrix.

-
Outstanding Speaker Management Precision
Time alignment delay, EQ, and other final-stage audio output adjustment tools are provided on all channels.

-
Full-featured Channel Processing
Eight channel strips feature four types of EQ, VCM vintage compressors, and more, for extensive processing capability in a remarkably compact space.

-
Post-production Recording Support
In addition to an ample selection of talkback, cue, and GPI functions, commentary functions provide extended voice-over recording support.

Signal Flow
Fonctionnalités
-
Advanced Monitoring and Communication

The heart of the MMP1 is a 40 x 36 channel monitor matrix* that can handle stereo, 5.1 channel, and 7.1 channel formats with ease, while also providing plenty of capacity for the rapidly growing array of immersive audio formats such as Dolby Atmos. To accommodate the widest possible range of installations, the MMP1 includes eight cue outputs and eight studio speaker outputs, with two talkback systems that function with those outputs. Comprehensive, integrated management of monitoring, cue, and talkback functions allows this powerful matrix to efficiently connect and route all essential audio throughout the studio.
* (32 inputs + 8 DSP channel inputs) x (32 outputs + stereo downmix outputs + stereo headphone outputs) @44.1, 48, 88.2, and 96 kHz. 20 x 20 channels @176.4 kHz and 192 kHz.
-
Flexible Bass Management for Any Environment

Bass management is a widely used, effective solution for low-frequency control in surround sound monitoring environments, but fixed bass management systems do not provide the flexibility required for the huge variety of speaker arrangements and mix routing configurations employed for immersive audio production. Unlike systems that simply provide a limited selection of speaker layout presets, the MMP1 has a dedicated, freely-configurable 32 x 32 channel* speaker matrix with crossover filters for bass management on all channels, providing extraordinary bass management flexibility for just about any studio environment.
Precision linear-phase FIR filters are available in addition to standard IIR filters, allowing phase interference between the main and LFE channels to be reduced to an absolute minimum for clear, well-defined sound and imaging.
* 32 x 32 channels @44.1, 48, 88.2, and 96 kHz. 16 x 16 channels @176.4 kHz and 192 kHz.
-
Outstanding Speaker Management Precision

The monitoring environment support provided by the MMP1 is complete in every detail, from inputs to final stage sonic adjustment. Time alignment delays, 6-band room EQ, and trims are provided on every one of the 32 monitor speaker output channels. This allows full, unabridged optimization of the monitor sound field for any format from stereo to the most complex multi-channel configurations.
-
Full-featured Channel Strips
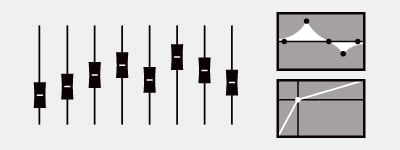
Designed for maximum integration and efficiency, the MMP1’s eight channel strips each include trim, delay, phase invert, filter, EQ, compression, and insert facilities. Everything needed for high-quality voice-over recording and other production tasks is built in, so the need for outboard processors and complex internal DAW routing is minimized.
-
VCM Vintage Compression
The compressor built into each channel strip is Yamaha’s acclaimed Comp260, a faithful VCM (Virtual Circuit Modeling) simulation of a prized analog compressor from the 1970s. Comp260 meticulously recreates the response and sound of the original VCA and RMS level detection circuitry.

-
Four EQ Algorithms
The MMP1 channel strips include 4 selectable EQ algorithms. The “Precise” algorithm makes it easy to target and control specific EQ points, the “Aggressive” algorithm is designed for the most musical response, and the “Smooth” algorithm offers smooth, natural control. There’s also a “Legacy” algorithm that provides the familiar feel and response of the equalizers provided in industry-standard Yamaha digital consoles. All of this EQ versatility significantly expands the system’s sound design capabilities.
-
Post-production Recording Support
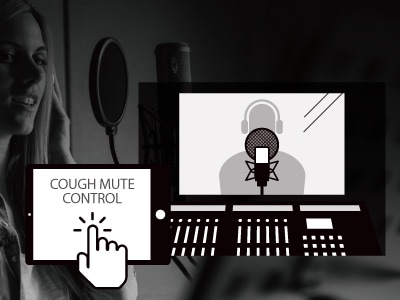
In addition to eight cue outputs and eight studio speaker outputs, with two talkback systems that function with those outputs, the MMP1 offers a commentary function that allows smooth communication with artists and voiceover talent. Artists in the booth can be provided with a separate “cough mute” controller connected to the MMP1 GPI interface. Cough mute status is visible via the MMP1 Editor in the control room, and when the cough mute function is “off” and the microphone is live, the booth monitor speakers are automatically muted to prevent feedback. A number of other details add up to flexible, efficient postproduction recording support.
-
Refined Sonic Quality
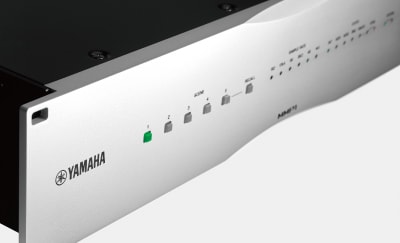
A studio’s monitoring environment determines its final sound, and has a significant influence on the quality of the work produced. For that reason the reproduction fidelity and spatial precision of the monitor system must be as close to perfect as possible. Yamaha’s design philosophy, a core concept ever since the legendary NS-10M monitor speakers, remains unchanged in the MMP1. Meticulous attention is paid to selecting each and every component as well as to even the smallest circuit design details, while “golden-eared” designers carry out test after test to ensure optimum tuning of the entire system. The result is unprecedented sonic quality in the MMP1.
-
Intuitive Setup and Operation

Two software applications contribute to stress-free MMP1 setup and operation. The MMP1 Editor* for Windows and Mac computers provides all-function access for everything from system design through file management to day-to-day operation. A setup wizard makes setup fast, easy, and precise. When the system is up and running the MMP1 Controller** app for iPad offers convenient, intuitive control of essential parameters.
* The MMP1 Editor can be downloaded from the Yamaha website.
** The MMP1 Controller app can be downloaded from the Apple App Store.
-
Nuage System Integration
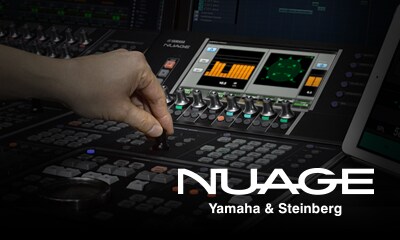
The MMP1 can be controlled directly from the monitor section of Yamaha’s NUAGE DAW system. Monitor source selection, levels, downmix and dimmer switching, talkback, and other functions can be controlled directly from physical controls on a Nuage Master or Nuage Fader unit. And because these functions can be accessed even when there is no computer or DAW online, monitor section operation is as direct and immediate as on a mixing console.
-
TMC-1 Remote Control Support
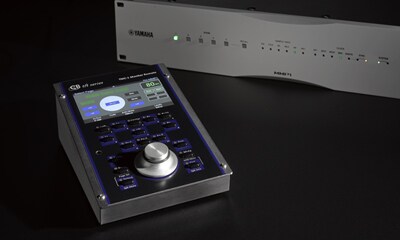
CB Electronics TMC-1 can be used to remotely control MMP1 monitor source selection, speaker system selection, levels, mute, and dim. Used in conjunction with the MMP1 Controller app for iPad, this provides convenient access to a wide range of detailed settings, for a more efficient, productive monitoring environment.
-
Secure, Convenient System Management
Three access levels are provided to maximize operability and prevent errors in situations where the system will be available to multiple users. 20 scene memories and snapshot capability further contribute to ease of use, allowing optimized project settings to be recalled in an instant. An emergency “all mute” function is also provided and accessible via the MMP1 Editor, GPI, and the MMP1 front panel.

-
Ample I/O and Easy Expansion
The MMP1 is equipped with eight highperformance analog input and output terminals as well as 16 channels of AES I/O. Dante audio networking capability is built in so that an additional 64 channels of audio data can be input and output via a single Ethernet cable. Dante also allows multi-channel audio transfer to and from a computer* so that the MMP1 can function as a DAW audio interface.
* The computer used must be equipped with a Yamaha Dante Accelerator card or Audinate Dante Virtual Soundcard.

-
More Than A Monitor Controller
The MMP1 is not limited to just studio monitor management. With two powerful matrix mixers, a wealth of high-performance effects, and a 16-pin GPI interface that can communicate with a variety of external devices, it can contribute to enhanced efficiency and operability in broadcast facilities and a wide spectrum of other applications. Redundant power supplies provide failsafe reliability.

Systèmes
Stereo (Audio Post)
In this audio post-production system three pairs of stereo monitors are provided in the control room (midfield, near-field, and small). One talkback microphone and one cue feed connect the control room to the studio/booth. The MMP1 GPI interface is used for cough box and cue light control.
Stereo (Music)
Three pairs of stereo monitors (large, near-field, and small) in the control room provide a variety of listening environments for music production. One talkback microphone is provided for control room to studio communication, while eight cue feeds deliver audio to multiple performers in the studio. MMP1 analog output is expanded via the Dante interface. Performances in the studio are fed to the control room DAW via MMP1 channel processing for maximum quality and efficiency.
5.1 Channel
Two full 5.1 channel speaker systems are provided in the control room (main and preview), in addition to two pars of stereo monitors (near-field and small). Separate talkback microphones are provided for the engineer and director. Three cue feeds are provided for local and remote recording. MMP1 analog output is expanded via the Dante interface, and built-in MMP1 bass management is applied to the 5.1 channel speaker systems.
Dolby Atmos 7.1.4
A full 7.1.4 channel speaker system and two pairs of stereo monitors (near-field and small) provide audio output in this control room designed for Dolby Atmos production. Separate talkback microphones are provided for the engineer and director, and one cue feed delivers audio to the studio/booth. MMP1 analog output is expanded via the Dante interface. For 7.1.4 channel playback individual bass management is applied to the front, left surround, right surround, and top surround zones. The MMP1 is controlled directly from the Nuage system monitor section, and the Dolby Atmos bed and object mixes are managed from the Nuage system touch screen.
* Les spécifications peuvent être modifiées sans préavis. Les couleurs et les finitions illustrées peuvent différer de celles des produits réels.


